As I left off last time I was about to cut the rear platform to size because I thought it too big. Before doing that, I decided to go to the local store with random cheap stuff (or as it is known around here, the Action) and found these bottles of 'Glitter Glue' if only my Eldar army was unfinished......
 |
| You can't call yourself a true Dire Avenger if there are nog glitters on your uniform! |
Having paid the gigantic sum of 1 euro (1,31 dollar) for the entire set of bottles I proceeded to empty the bottles in a plastic cup. I always use a plastic bag or cup while building scenery or modeling to throw my trash in. It keeps the workplace (relatively) clean and makes it easier to find little pieces that 'blast off' as you apply the scalpel. Anyway gloop for Nurgle!
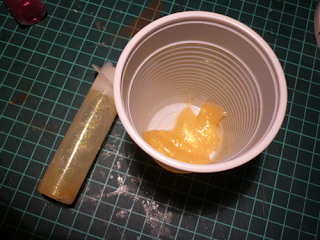
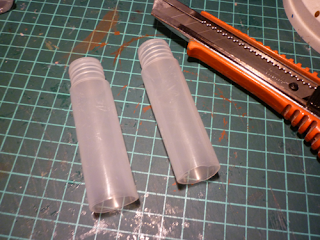
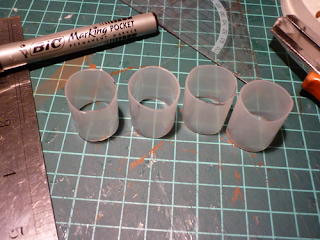
So now to cut the bottles apart, and then cut them to glass cylinders on the back of plasma generator thingies:
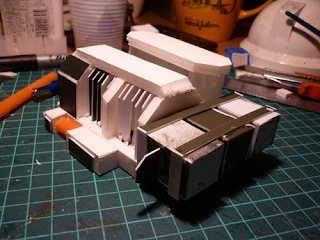
And the finished result. I placed one of my Catachan Heavy Flamer people on top to give a bit more sense of scale to the entire model so far:

Now the next part was redoing the big boxes on the side. I tried building it with foamboard, but the scale is so small that all attempts to properly cover the sides ended up making the boxes extremely ugly. In the end I went for plasticard and plastic glue. On the upside, I finally am able to cut plasticard without the stuff flying out from under my metal ruler (and over the table as I grasp my bleeding hand and curse (but I'm getting carried away here)):

On to the heavy duty power cables (also known as drinking straws). I learned quite early on that plastic glue does not work on drinking straws. In the end I used the transparent hobby glue/universal glue I also use on my foamboard. It is very cheap, it gives a quick 'in place dry' (after which your stuff stays in place, but you can move it without destroying anything) and the end result is tough enough for gaming (in my experience). Added bonus: it also works on drinking straws.

So now my plasma generator is looking like the end product should look.

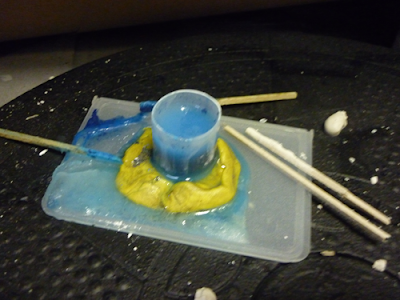
As the next step, I wanted to use some water effects like stuff in the clear tanks, with some blue paint mixed in to give it that Plasma generated electricity feeling. I used a two part slow drying epoxy with some Ice Blue and Regal Blue mixed in. I put this mixture in a spare bit of plastic glue bottle fitted in kneading eraser (from the same cheap stuff emporium).
It started out looking at least a bit interesting:

And ended up an unmitigated, leaky, sticky glob that is crying for the garbage can. If only I could move this mess!!! Is that grandfather Nurgle's burbling laugh I hear?
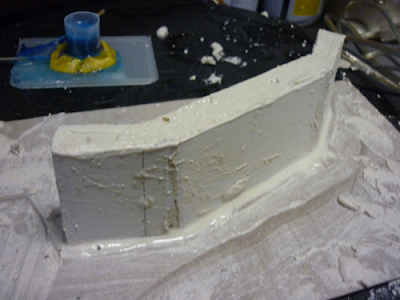
Meanwhile the wall section (which I forgot to photograph being build) is drying nicely in its first plaster cast (to give it that concrete-vibe). In the background a sticky mess:
As an aside, this is one of my plaster/glue/other horrendous stuff brushes. I picked it up in a bundle of ten (guess in what store). It is so incredibly shoddy, it is hardly good enough to smear plaster on walls with. Every time I see it, I feel a deep sense of love for my real brushes. So if you ever have a chance to pick a set like these up, they are worth it (if only for comedy value).

In the end I got carried away and made and beveled my MDF base as well. I also gave the main model a first coating of Gesso/PVA mixture. The mixture is yellow because I add colorant to it (so I can see where I have already been on my white model). Next shot a Gesso'ed generator with a painted Catachan on top and a beveled base below:


In the end this assemblage was finished and glued to the model. This is one of those 'it looks better in real life' shots.


So now my plasma generator is looking like the end product should look.

As the next step, I wanted to use some water effects like stuff in the clear tanks, with some blue paint mixed in to give it that Plasma generated electricity feeling. I used a two part slow drying epoxy with some Ice Blue and Regal Blue mixed in. I put this mixture in a spare bit of plastic glue bottle fitted in kneading eraser (from the same cheap stuff emporium).
It started out looking at least a bit interesting:

And ended up an unmitigated, leaky, sticky glob that is crying for the garbage can. If only I could move this mess!!! Is that grandfather Nurgle's burbling laugh I hear?

Meanwhile the wall section (which I forgot to photograph being build) is drying nicely in its first plaster cast (to give it that concrete-vibe). In the background a sticky mess:

As an aside, this is one of my plaster/glue/other horrendous stuff brushes. I picked it up in a bundle of ten (guess in what store). It is so incredibly shoddy, it is hardly good enough to smear plaster on walls with. Every time I see it, I feel a deep sense of love for my real brushes. So if you ever have a chance to pick a set like these up, they are worth it (if only for comedy value).

In the end I got carried away and made and beveled my MDF base as well. I also gave the main model a first coating of Gesso/PVA mixture. The mixture is yellow because I add colorant to it (so I can see where I have already been on my white model). Next shot a Gesso'ed generator with a painted Catachan on top and a beveled base below:

So now it is on to taking off some annoying bits that are sticking out (for want of a better term), applying a second coating of Gesso and doing some interesting things with the base. Then a Chaos Black basecoat and finally we will see how painting goes. The most difficult question for me right now is what to do with the plastic cylinders. I don't want to paint them, I most definitively won't go for the epoxy filling and I'm too old school for led's. Ah well we'll see if inspiration hits.
No comments:
Post a Comment