After that I waited for it to dry a bit, applied Gesso and then stippled the entire wall with a brush to this result, which I rather like (so I had a direction for the walls of the Manufactorum):
Then I started on the roof (well actually I started on the little fence around the landing pad but I got so carried away I forgot to take photos. I used my new hacksaw to cut a few bits off wood that will act as the roof support (I love that saw, should have bought it earlier). Then I pinned the wooden beams to each other and to the chimney and wall. As the PVA glue dried enough to take some pressure it feels like a rather sturdy construction.
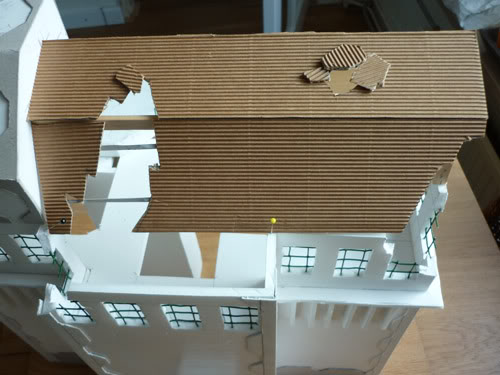
After buying brand new corrugated cardboard I found the old bit I had stored (as per Murphy's Law). I cut the bits to size, gave in to my destructive urges to cut away some destroyed parts and then on a whim added a few thin slices of cardboard to give the impression off support struts still in place. To test the look I used a few pins to keep the bits in place for the photo.
I also used some 1 mm cardboard to add some detail around the door and the bottom front of the structure (I wall add some copper bends I have lying around to these parts).
As I went through the photographs off the roof supports I actually found a picture that actually shows the little fence around the landing platform.
Finally I was off to my workbench for some serious work with filler. I quickly discovered that trying out techniques on a bit off leftover foamboard may be a good idea, but that this doesn't necessarily translate to a finished building. I finally opted for a combination of my spackling knifes, sponges and my fingers (all the while wondering why I didn't go for roughcoat and why I didn't just start with a small square bunker). The end result will have to be sanded, cleaned off some excess filler and covered in Gesso but I think it works reasonably well (and keeps the level of required detail).
One of the best things about filler is that it covers up all the small gaps and little mistakes I made cutting. The picture doesn't do this full justice but the bottom side forms one piece with the platform itself now.
Anyway all this filler has to dry. Tomorrow I will start sanding it, cover it in Gesso and then I can start on the base and the interior of the building (and hopefully a bit of painting).


No comments:
Post a Comment