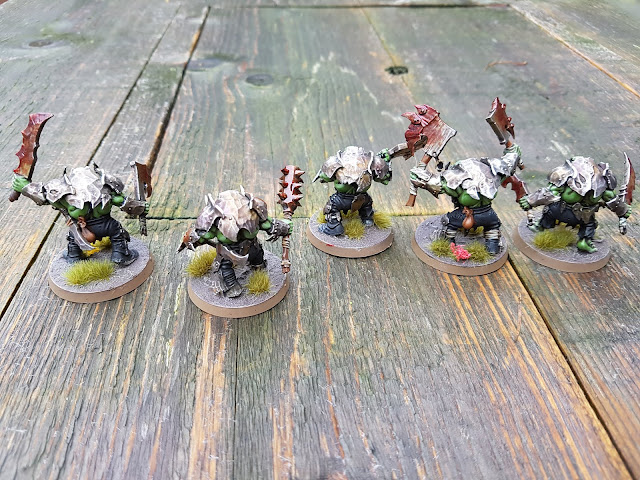
Yesterday I found myself with an unexpected day off. A pleasant surprise I used to catch up on my paintwork. As part of the 'Finish the Orruks Project' I started last year I glued these five Orruk Brutes together. To help with painting I did not glue the breastplates on (except for the one wielding the
comically oversized double handed blade Gore-choppa). Over the course of the last few months one of the breastplates went missing. Luckily this weekend I found said breastplate at the bottom of a box of Vallejo paints. Taking it as a sign I decided to finish the Brutes before more parts could go missing.
 |
| My Orruk Brutes are ready to smash and kill. |
I love the
Ironjawz battletome. These hulking brutes armor themselves by banging metal into shape with their bare hands. They seek out the biggest creatures on the battlefield to pound them into dust. And see any large obstacle as a reason to 'mob up' and take it down. My first encounter with Orruk Brutes was when I foolishly charged a Troggoth Hag into a unit of five, only to watch it fly back into my ranks in small bits.
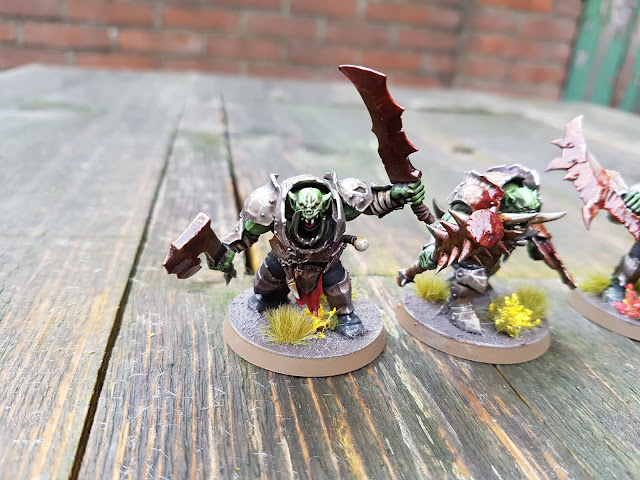 |
| This model lacks its own jaw, having replaced it with an iron prosthetic. |
What I like a bit less about the Ironjawz is the painting style GW has decided on. The bright yellow color looks a bit too 40K for my taste. But that's the joy of painting (Warhammer style), you can give your own twist to models. For my Brutes I decided on the same look as the
Ironjaw Megaboss I painted last year. That is to say: rusty metal plates and fresh blood.
 |
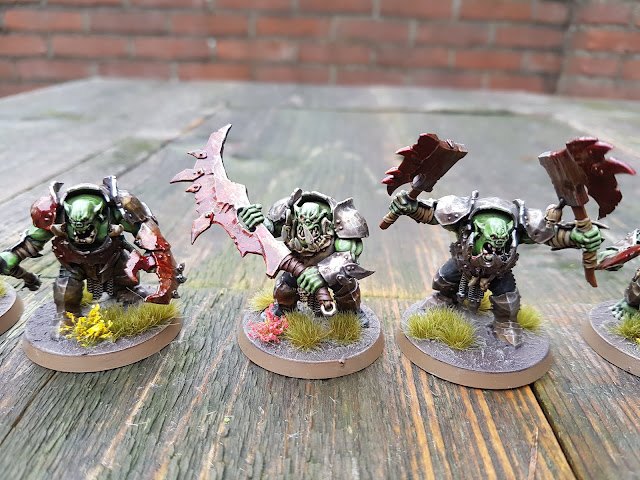
| If the claw hits the club hits automatically, making this brute a real killing machine. The one with the Gore-choppa gets extra range and damage. |
The Brutes are covered with thick metal plates. I painted these Leadbelcher, picking some trusty German Grey for the pants (a nice and neutral deep grey) and painting the skin is Vallejo Goblin Green washed. I covered the models in a fat slosh of Agrax Earthshade. After the Eartshade dried I layered the skin with 50/50 Goblin Green/GW Nurgling Green and highlighted with pure Nurgling Green.
 |
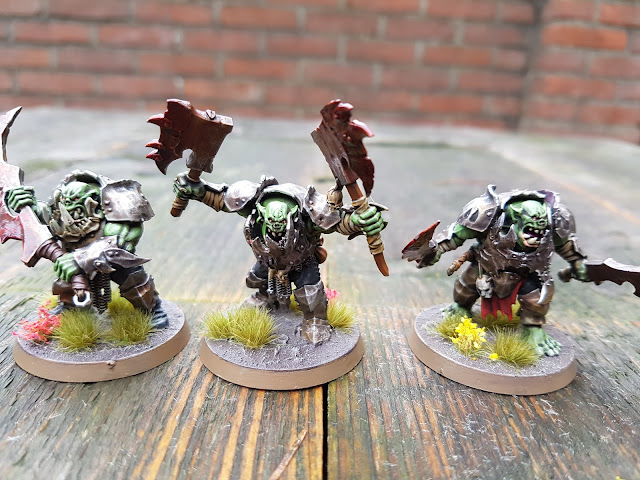
| Another shot of the Gore-choppa wielder, this model is harder to paint then the rest as you can't practically leave the breastplate off before painting. |
For the armor I loaded my airbrush with a lot of flow improver and a small drop of a purple (Vallejo Imperial Blue Game Air) adding small patches of semi-transparant blueish-purple to some places. I repeated this proces with Vallejo Rust and Vallejo Orange. Then I allowed the models to dry. Next up for the armor was a light drybrush with Ironbreaker followed by a selective edge highlight with Stormhost Silver.
 |
| I love the intimidating pose of the Orruk with the two axes. |
Teeth and most bandage straps holding the armor in place where painted Zandri Dust, followed by Agrax Earthshade and highlighted with Ushabti Bone. I then selectively washed bits with Gryphonne Sepia to break the monotony. I also watered down a bit of Dryad Bark and washed other bandages with that for the same reason.
 |
| Last in the line is mr. Barefoot the dual sword wielder. Somewhere in the Ironjaw battletome is a hint that barefooted Orruks are smarter then their shoe wearing counterparts. No idea of that is an in-joke, a reference I don't get or just one of those wink/smile things to spice up the battletome. |
The bases are a bit too simple for my taste, but I wanted to bring the models to table directly after painting them (and succeeded) so I went for Vallejo Dark Earth Paste painted with watered down Dryad Bark and drybrushed with Tyrant Skull. I added some Gamers Grass tufts and flowers. Although I bought the flowers for my Highborn Aelfs I love adding them to Destruction bases. It causes a nice clash between base and model.
 |
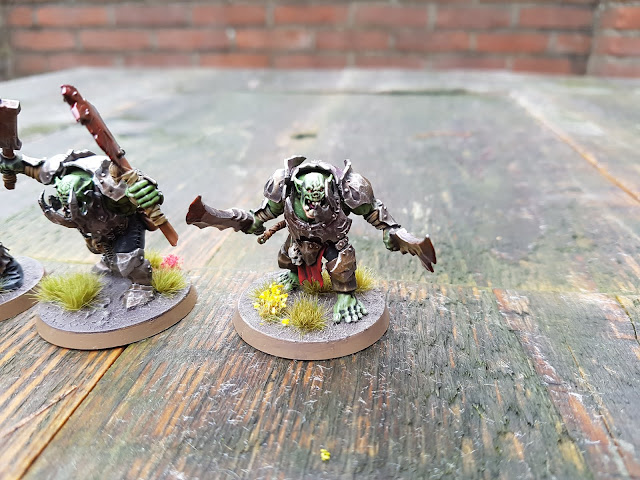
| A shot of the back, the daylight reflects a bit more of the metal look then you usually see on the table, you'll just have to take my word that these guys look quite rusty and dirty. |
Last but not least was adding blood with a technique based on the by now often mentioned tutorial of
Tale of Painters. I diverged slightly from and used the following steps (allow time to dry between each step).
- Splash a random pattern of Reikland Fleshshade Gloss.
- Repeat step 1.
- Mix 30/70 GW Evil Sunz Scarlet with Vallejo Smoke, water it down to create a wash and add it randomly to the patterns made in step 1 and 2.
- Mix Vallejo Smoke with Tamiya Clear Red (about 40/60) and apply as the first 'solid' layer of blood'. Remember less is more.
- Add pure Tamiya Clear Red sparingly to get some fresh blood on the weapon.
- Add small drops of Blood for the Blood god. After applying use an old brush to stiple the applied Blood for the Blood got around a bit (it is a rather thick paint).
The advantage of this technique over just applying some Blood for the Blood God is that details on the weapons don't get covered and the blood pattern looks a bit more realistic and interesting (IMHO).
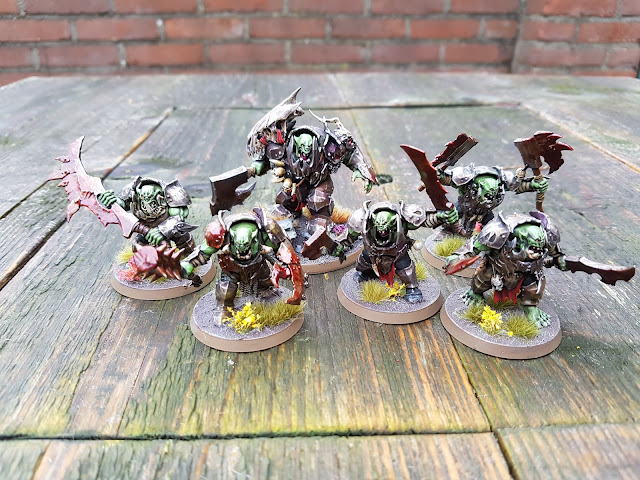 |
| My Brutes and Megaboss form a small but deadly formation. |
Here's a last shot of the Orruk Brutes accompanied by my Megaboss. During the fight with Kharadron Overlords yesterday my Megaboss got reduced to 1 wound by taking (among other things) a cannon blast to the chest. Then he was cut down as I discovered Arakanaut Admirals get to strike first if they want to. The brutes on the other hand made short work of one (silly weak) Arkanaut Company and a unit of Endrinriggers. They did show their main disadvantages as well (a 4 inch move means it takes time to get into 'the thick of it' and a low bravery means the unit runs after taking a few casualties). I'll finish off with a quick shot of the Brutes getting stuck in (top-left).
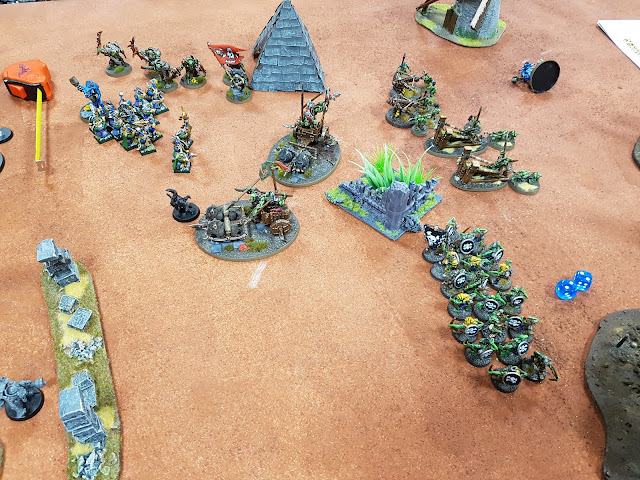 |
| Still smelling of fresh paint, my Brutes wandered into battle the same evening. Also pictured is a finished Orruk Warboss with Battle Banner I finished yesterday as well. I'll put him up some other time on the blog. |


Those new orruk minis are awesome. I´d like to buy some of the to my orc & goblins army, they would be the bigger brothers. You really did a great job painting them, they look really nice.
ReplyDeleteThanks, I think they really fit in nicely with the other Orcs (even my Orcs through the ages collection :).
DeleteMuch much better than yellow!
ReplyDeleteI never realized that the Brutes have "beetle backs". Could be an interesting spot to put on some Orky heraldry.
Cheers! The 'beetle backs' should do nicely for adding Orky heraldry. I blike the way GW has textured the metal. Making an Orc look weathered requires little more than a bit of washing and some drybrushing (adding extra steps does help).
Delete