Resin 3D printing may be laborious to get a grip on, but it offers an awesome addition to the hobby. Unfortunately, as I found out, when the temperatures drop, the resin becomes too viscous and prints start failing. Here's the solution I came up with.
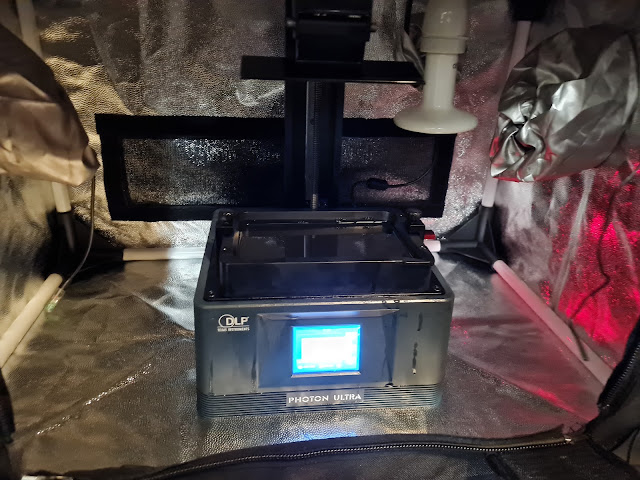 |
| By placing the 3D printer in a growing tent I can lose the cover as external light is blocked by the tent. It gained me precisely the amount of space I needed to fit everything in there. |
Don't worry, I did not steal a prop off of a sci-fi set. Instead I combined components meant to keep lizards comfy in a terrarium with a tent meant to nurse plants. Not shown is a small digital thermometer allowing me to keep an eye on the temperatures. Let's pop over to an outside shot.
 |
| Seen from the outside, the full setup in action. A bit boring :) The red light on the left is the thermostat telling me it is working. |
3D printing resin, as I discovered while figuring out why my prints started failing, needs to be above 20 degrees Celcius (68F for the metrically challenged) for optimal performance. High quality resins apparently even need to be around 25C (77F). This makes a well ventilated space for the printer a bit of a liability when the local temperature hovers between -4C and 4C in winter (25-39F). Add to that that a proper 'hot' Dutch summer reaches around 30C and for most of springtime and autumn we're well below 20C, an investment in a stable environment became interesting.
 |
| I can check progress by removing the front flap and looking through a plastic window, that helps keep the heat inside. |
After a lot of browsing, I discovered I wasn't the only one with this problem. I saw a few people using an electric heater to heat up the entire room, but that didn't seem economical, especially as my room is well ventilated (and it's cold outside (not the Christmas classic)). I also saw people who put a brewbelt around the resin vat. That looked interesting, but I was a bit worried about the difference in size and form of a resin vat versus a brewing vat. I would need to crumple the band up. I don't think starting electrical fires is a great move and crumpling a heating elements seemed a bit too risky to me (I may just be overly cautious here though).
 |
| This ceramic heater (in a heat resistant porcelain socket) gives off no light, only heat. The red glow you see is an OSL achieved by...sorry writing habits are hard to shake ;) It is the light from the USB-stick in the printer. |
Then inspiration struck. I was pondering starting a Lizardman army (I do not have enough armies ;) and I remembered reptiles are coldblooded and probably need heating, especially as there are some fellow Dutchies who actually have these creatures as pets (and I assume those survive the winter). Checking pet stores I discovered you could get a thermostat for a terrarium and add heating elements. This would give me a system that automatically switches the heat off at a certain point and putts it back on below another. In other words: a prudent and save way to heat up a space for 3D printing. I got the Exo Terra 300W thermostat figuring the max power cost almost nothing extra and would serve me if one heating element didn't suffice. Next I bought an (in hindsight) anemic 8W heating mat. The enclosure space from my 3D printer case is relatively small (and the more powerful alternative heat mats would't fit there).
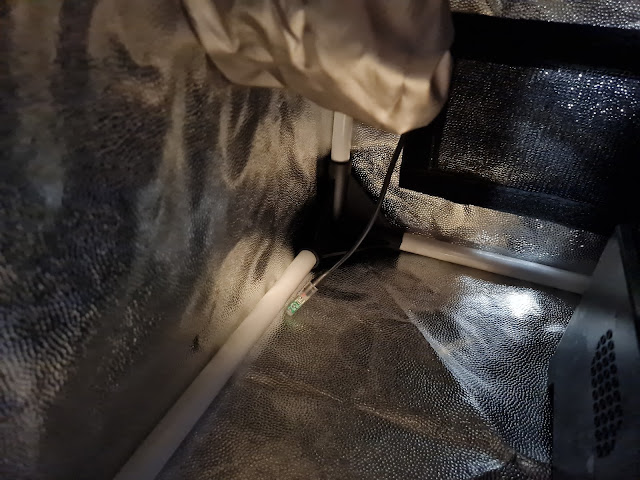 |
| I put the thermostat's sensor on the opposite side of the lamp in the bottom of the tent, hopefully this keeps the readings at the worst case point. |
Unfortunately the heating mat only got the standard Anycubic enclosure up to around 15C in a 4C room. Still nice, but not enough. So I changed the mat for a 100W ceramic heater (Operation Overkill was a go). This heater looks like a lamp, but doesn't give off light, only heat. I first planned to make a hole in the top of the enclosure to fit the lamp, but since you can't get replacement enclosures (and knowing myself) I hesitated. Instead I decided to look for alternatives and ended up with growing tents.
 |
| To keep an eye on the temperature without losing heat I got a small digital thermometer with a sensor I could place in the tent. |
As far as I know growing tents tend to be used in illegal pot operations. Most are about 2 meters (6 feet) or higher (pot plants get big). Luckily it seems there are smaller versions and this was the smallest I could find (40x40x60cm (or 15.7x15.7x23.6 inches (Napoleon should've invaded the US /s))). It has a metal frame on the inside I can hang my heater on and it has insulated entrances for the cabling and the thermostat's sensor. It also features a plastic window that can be covered with extra insulation. The tent works like a charm. I can now easily keep my resin flowing smoothly while retaining a balmy around 25C temperature within it. With an investment below 100 euro (around 100 dollars ;)) I can print year-round instead of during a few months in summer. Well worth it I guess (assuming I can figure out the settings for my resin as I lost them, but that's another story ;).
Very nice looking set up, and being able to print year round is a huge plus! I was going to say that 4 degrees is pretty cold for a garage, but this week we might be that cold in the early morning. Filament printers have issues with heat too, but they provide their own if you have a tent or similar enclosure.
ReplyDelete4 Celsius to be sure. But still a reasonably cold winter with freezing temperatures outside. Ah filament, I had a Franksteined CR-10 printer on loan for a bit, but it's stitched together nature gave a lot of problems. I'm still occasionally tempted to get one, less smell and cheaper large volume prints are tempting after all.
Delete