Most of the fantasy themed battles I fought over the past few years used my Townscape buildings and the two version of woodland terrain in my collection. That's all nice and well, but I've always wanted to expand into different styles of 'table dressing'. Recently I decided to turn to 3D-printing once more to turn that dream into reality. Starting out with a very pretty set of Dwarf themed terrain by Cast n Play Miniatures.
 |
| This former Dwarven hold contains a bridge, lots of cover and some difficult terrain. |
The bulk of this set has been printed in PLA (a string of plastic on a spool that is molten down and layered into shape by the 3D-printer). Only the bridge, the lava spewing statue in the background and the two statues of Dwarven heads vomiting up barrels, have been printed in resin. I was able to switch to PLA because I've added an extra 3D-printer to the collection for this purpose.
 |
| The links on the printed chains on the bridget actually move independently from each other. I was quite surprised to discover this was possible. |
The main advantage of PLA is that it is easier to work with (assuming you get a recent model printer). Following my brother's advice I invested in an Bambu Lab P1P printer. This model takes almost all of the difficulty out of setting up and operating a PLA-printer, without breaking the bank (completely). So far I've only had one print fail on me (twice) and it turned out to be an error on my side (I made a rookie mistake letting go of the PLA-string on the spool before loading it into the printer causing it to get twisted and stuck).
 |
| The reason I have two barrel vomiting statues was a mistake on my part, I started the same print twice because I couldn't be bothered to put on my reading glasses before operating the printer (oh dear I'm 'reading glasses'-old these days). |
The upside of PLA is that you don't need to wash your prints in IPA of other chemicals and you don't need to wear protective gear to work with it. It produces almost no smell (especially compared to the resin printer) and the build plate (that determines how big your prints can be) is quite large. The one on my printer is 25x25 cm (10x10 inch) and can go up to 25cm high. On the downside PLA tends to take a bit more time to complete prints because the size of your print determines the print time. On resin printers only the height of the print matters. The PLA printer is also quite loud as uses a noisy fan to cool the material as it prints. Placing it in the garage takes care of this problem, I wouldn't want to have one of these machines in the living room/hobby room/home office.
 |
| The downside of PLA is that you can't avoid the print lines completely. They show up rather badly on the chest in the center of the piece above. |
Another disadvantage of PLA is that the layers of molten plastic it stacks on top of each other leave visible lines. You can see these, especially if you set the 'layer height' too high. But even on very small settings, the lines show. I've experimented with watered down PLA to cover the lines up and this seems to works reasonably well, but not perfectly. I did not use that trick for these models. The Dwarf head on the left above is one of the worst offenders. It was my first print on the new printer and I forgot to change the default layer size. It doesn't really show up on the picture, but you can still see the lines in real life. The most important disadvantage of these lines is that you can't really drybrush PLA-printed models.
 |
| To paint the torchlight, I decided to invert the lava painting process. I think it sort of works. |
Luckily drybrushing is not the only go-to technique to paint large terrain pieces. I'd even go so far as to say there is a better option available: sponging. I started painting this terrain set using an airbrush. I applied a basecoat with an almost black primer (my favorite: German Grey by Vallejo). On top of that I semi-zenithal sprayed VMA Concrete. It is a nice greyish' brown that adds a lot of yellow to the stonework. On top of the Concrete I sprayed VGA Stonewall Grey; a lighter grey with a yellowish undertone. I added a bit of white to the grey to round out the zenithal basecoat.
 |
| It's nice to have a cool looking bridge, but now I need a river to have something to bridge. Should I make a regular river or a river of lava? Questions, questions... |
At this point the set had a nice basic grey cast to it, but lacked a spark of life. I solved this by spraying thinned down contrast paint on the grey. I used Mortarion Grime and Skeleton Horde by GW to add interesting spots. I also brushed on Ghamak Sewer on select spots where extra contrast was needed. I was loathe to use washes because during an earlier experimenting painting PLA printed models the print soaked in the wash through the plastic lines. I shouldn't have worried, when I added a few thinned washes at a later stage, they did what they needed to do without (literally) disappearing through invisible cracks.
 |
| I'm rather chuffed with the look of the stonework on top of the bridge, especially as the proces was 'this looks cool, I should stop adding paint...oh dear I added more paint. Wait it looks even cooler, I should stop adding paint...etc.' |
When all the basic layers, washes and contrast paints had dried, I poured Stonewall grey on a palette, broke of a bit of (ancient) blister pack sponge (you can use a modern sponge with a fine texture if you're not an ancient collector sitting on a pile of discarded GW packaging and models like a Dragon). I dipped the sponge in paint, took excess paint off with a bit of paper towel (like a drybrush) and carefully (brazenly would be a better word) re-applied Stonewall Grey on the model in a mottled pattern. I repeated this multiple times, adding white to the grey between steps. This method has two major advantages. One is that the mottled pattern the sponge leaves, makes the stonework look more realistic. Secondly the sponge presses slightly down into the model and doesn't bring out the layer lines like a drybrush would. Aside from that, it is quite a zen activity that doesn't require a steady hand. A nice audio book in the background makes this activity even more enjoyable.
 |
| Don't think about the heat or the logic of a lava spewing statue, just enjoy the cool-factor. |
All the sponging made the stone look slightly too white. I solved this (after allowing everything to dry) by sponging extremely watered down Athonian Camoshade and Reikland Flesshade washes in random patterns (as fancy took me). I watered down these washes so much, they almost looked like paint water. By watering them down so much, they left just enough of an impression to make the stone look slightly more weathered without adding too much of their color.
 |
| I can't help by be amazed by how simple the paint work looks when it is finished. |
The final step for the stonework was a last pass with Mortarion Grime through the airbrush, hitting the bottom of the stonework. This added to the moss/lichen-like effect on the bottom that started during the first round of contrast-painting. I also sprayed some Militarum Green contrast on top of the brown bits of rubble on the bases to add some extra color. Speaking of color: I think I'd be remiss if I didn't mention the lava and crystals. I was rather happy to find a few elements that would add some color to the grey of this terrain set.
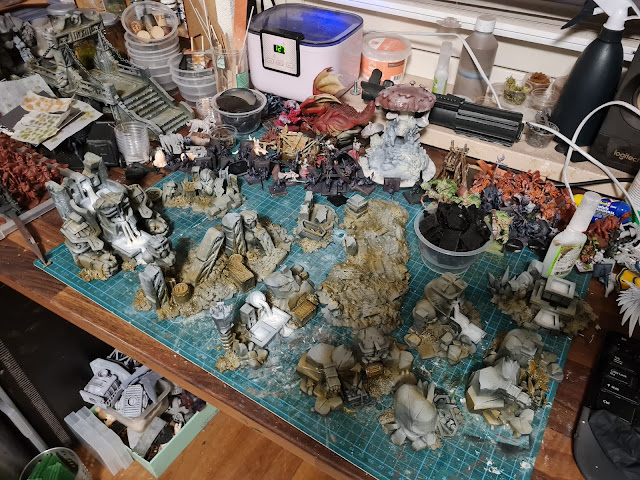 |
| As a bloody happy aside: I've regained a small measure of space on my overflowing hobby desk. |
I took the lava into account early into the painting process; spraying the surfaces that needed to glow white with the airbrush. I started out with the brush, painting an outer circle of VGC Bloody Red around the basins of lava. With the red still wet, I added a second ring with AK Deep Orange, one of their awesome 'Intense' colors. I followed up with AK Deep Yellow in the center. I tried (and failed) to leave the middle bit white. To compensate I just globbed in pure white paint where I wanted the heat too look extra hot. Because I applied fat layers of paint, I had ample opportunity to mix the different colors on the models. When things got out of hand, I just added more paint, mixed it some more and after a while the lava looked lava-like enough for my taste.
 |
| For those of you wondering: the terrain set was so big, I had to fall back on an old (and badly stored) backdrop to take pictures. Apologies for the wrinkles in the sky. |
 |
| You can almost hear the engineer scream: "What happened to my beautiful workshop?" |
The last step of the job was painting the crystals. It took a lot of restraint to stop myself from painting them with a pretty glowing green effect. There's only so much warpstone you can feasibly put in a former Dwarven hold (it'll be a different story when I get around to some Skaven themed terrain...). Painting the crystals was rather simple. I used AK Deep Blue and followed up with the airbrush. I thinned down Deep Blue (to stop the airbrush from chocking) and added drops of white to get the crystal effect. I used a bit of paper to block (most of) the overspray. When the crystals look okay enough, I emptied the airbrush and sprayed on the glow effect using thinned down Blue Fluorescent by Vallejo. With that I declared the set finished and hopped over to the next project. More on that soon(ish).
Absolutely amazing. I do love a set of themed terrain and this one is amazing.
ReplyDeleteThe lava has worked extremely well, though I'm shuddering at the Health and Safety implications, no guard rails and none of the dwarves are wearing PPE.
But seriously, you've earned at least two pats on the back here.
As for the river, lava would fit in just right, but would water be more useful in games?
Thanks, pats on the back are always welcome :D. I think a Chaos god called Osha might just give Malal a run for his money when it comes to destroying both Chaos and the Old World. "Skulls? SKULLS? How about we focus on guard rails and hazard striping first mister! And don't think I haven't noticed the relative weight of those ridiculously oversized weapons you make your troops carry."
DeleteI think I'm going to make a water filled river to start with. The first bits of plastic have already left the print bed. I'm also pondering if a river printed on the same neoprene rubber as the gaming mat wouldn't be a better idea. We'll see. A lava river would have to be added to the collection at some point of course. And then safety gear, warning stripes, hazard lights....oh dear Osha's Black Crusade seems to have started.
I keep meaning to try Black Magic Craft's method of rivers with rubber sheeting and acrylic caulking.
DeleteHow have I managed to miss the existence of Black Magic Craft? That looks like a wonderfully entertaining channel, cheers for the hint, I'm going to enjoy watching his videos.
DeleteQuite a good set of terrain!
ReplyDeleteI have an Ender 3, and I am sure that with a newer printer you can print even better stuff than I can with it. I have done quite a lot of Battletech and 15mm WWII stuff with it, as well as terrain and other random things. Rather than watered down PVA, I just put it on out of the bottle, where ever the plates and panels should be smooth, and it seems fine to me. For sloped armor or something, I do sand a bit first and then paint the glue on.
Cheers. The Ender 3 was on my shortlist it looks like an excellent machine. I suspect the print quality won't differ between that one and the P1P (but I would miss the built in camera function I have now).
DeleteI don't think I'm brave enough for unthinned PVA straight out of the bottle (that's a move reserved for Single Malt if you ask me ;). I have been considering making a 'PVA bath'. Drenching models in a tub of thinned down glue sounds lazy enough to fit in my way of working, while keeping my unreasonable fear of pure PVA intact. I think I'll try it when I'm done ruining electronics in an attempt to build a new flock-box.