Aside from a rather over the top crazy 3D-printing project that's taking a lot of time, I've been refocusing on my Skaven horde. Just to be sure: I never fully take my eyes of them, they are a rather untrustworthy bunch after all. One of the clans in my collection that really needs a boost is Pesilens. My Plague Monks need reinforcements. I have good news for them: there are several extra units lined up (and glued together). This weekend I painted a Plague Furnace for them to die cluster around.
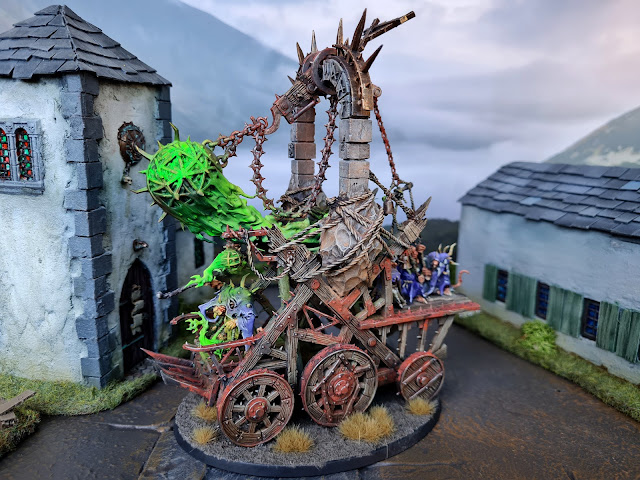 |
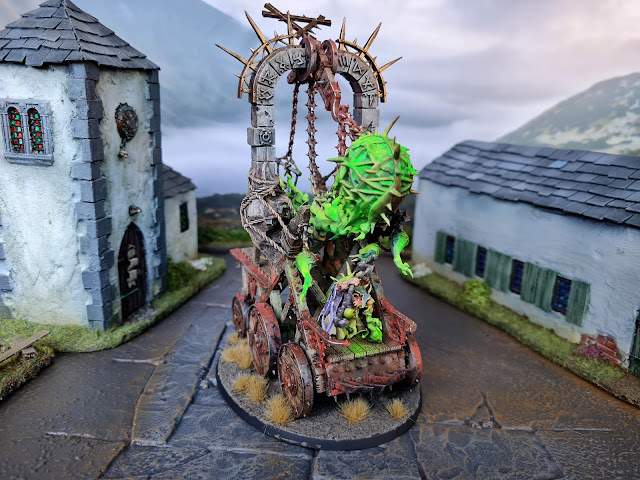
| They see me rollin', they hatin'... |
If I recall correctly, this was the first GW model that featured sculpted 'special effects' and people hated it for that very reason (little did they know that wobbly undead riding clouds would be next). To each his own, but back then the third party bits market was full of add-on missile launcher smoke effects and the like, so I rather got why GW got on board and told its sculptors to let go with the CAD-design software. I didn't dislike the model, but I wasn't quite blown away either. That's why I never got around to building one. When I got the kit, I went for the Screaming Bell option. This lasted until my birthday came along this year (I just had to buy myself a few more Skaven (and five dog-assassins is quite enough, I'll hold of expanding my Eshin collection for now...).
 |
| I am getting fonder and fonder of weathering powders. I also remembered to use these on the 'dirty' side of my hobby area instead of the 'painting' side. They are messy. |
The Plague Furnace is basically a silly over-the-top version of the venerable Plague Censer Bearer. The Plague Monks fill this huge censer with Warpstone, somehow set it on fire and then have a bunch of fanatics push the entire platform into the enemy, killing them with the kind gift of Chaos gifts. The Plague Priest riding on the front of the platform is a good reason on itself to get this kit. It is one of my favorite recent (as in the past 2 decades) GW sculpts.
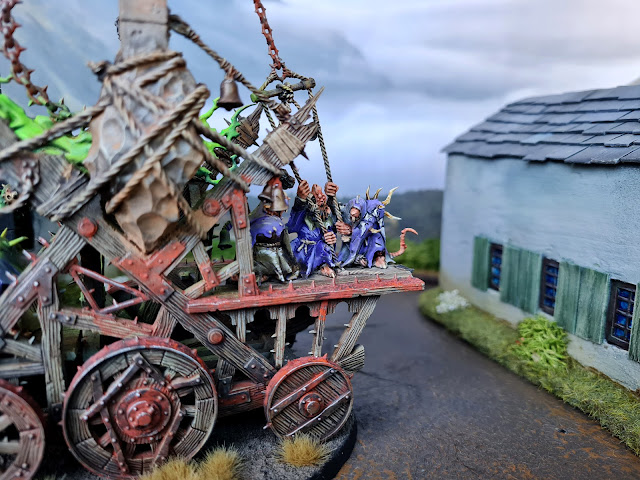 |
| I quite uncharacteristically assembled the entire model before painting, leaving only the Plague Priest separate. It made painting these monks a bit of a challenge, but I didn't see a way to glue them on later without damaging the paint I applied. |
On the back of the wagon you find the poor crew that have to toll the
 |
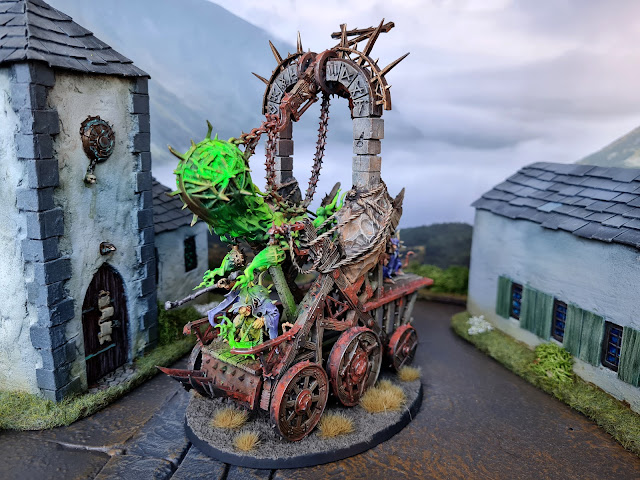
| I used a home made mix of weathering powder on the rocky base of the portal holding the censer. I recently bought four Vallejo powders in one package, only to find out I hated every single color in the box. Luckily you can mix weathering powders and make better colors. |
I bought a little AK booklet called 'Realistic Wood Effects' because I think the wood on my models looks boring. I know common wisdom has it that you can find everything you need to know on the the internet, but I disagree. Getting a book every know and again helps you break out of the echo chamber (all these bloggers repeating each other and sharing the same technique (oh wait I'm a blogger, oops never mind ;)). Also the Forge World Masterclass books are awesome publication. I love riffling through them just to gaze at the pictures and admire the layout. In case of the AK book, I quickly realized I was supposed to buy the accompanying paint set with it. Being rather stubborn, I decided to improvise instead. The things you learn when you just mess around trying to copy pictures. I used grey to paint the wood on this model (Stonewall Grey by Vallejo). The weathered brownish color was entirely achieved using watered Agrax Earthshade and Athonian Camoshide washes. I used a bit of oil and enamel weathering at a later point, but this was mostly kept to a minimum (in corners) to let the old greyish wood shine on its own.
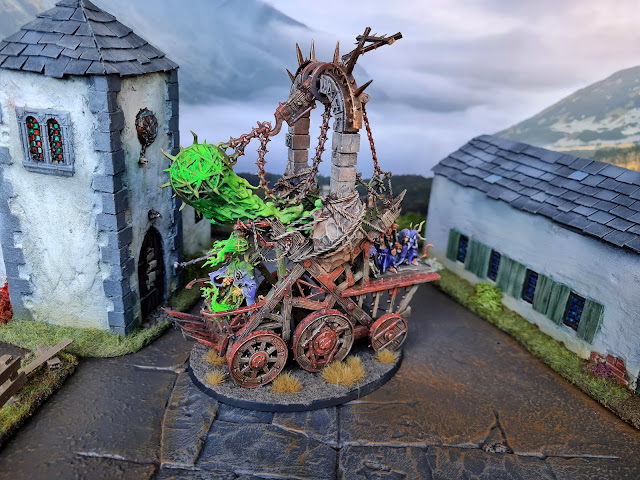 |
| I painted the model completely separate from its base, gluing it on with PVA while the earth paste was still drying. I promptly forgot the glue was fresh five minutes later, picking up the model and tearing it of its base. Luckily well placed patches of tuft hide that mistake reasonably well. |
The burning warpstone was begging for its own treatment. There are no 'Realistic Warpstone Effects' booklets to lean from (and what a shame there aren't!), so I decided to just 'go to town' myself. I started out using Scalecolor Decayed Metal to paint all the bronze bits. I followed up with a quick drybrush using Vallejo Brassy Brass (after discovering all my GW metallics had dried out (damn lids)). With the basic metalwork in place, I painted everything warpstone a deep dark green (Caliban Green). Then I picked up the airbrush and added several thin layers of Scorpy Green (VGA) on the dark green. I used a piece of paper to stop overspray from hitting the rest of my model. I didn't worry about hitting the brass. It was going to glow anyway. After I achieved a reasonable amount of contrast between the light and the dark green, I cleaned out the airbrush and went back in with a slightly thicker coat of Livery Green (VGA). I wanted this to coat to cover a bit better as I only used it to accentuate points on the model. I finished up with a thin coat of Vallejo Green Fluo.
 |
| I'm extremely satisfied with the OSL on the belly and floor of the priest (and on his back, but that is difficult to see from this picture). It's always scary to aim a loaded airbrush at a fully painted model and just blast away. The risk does make the pay-off all the more satisfying though. |
When this had dried I gloss coated the entire model (I had to add rust weathering powders to the steel anyway). Then I added a bit of Pretty Me (crazy nail art decoration) green fluorescent powder to the wapstone. As you can see, it glows. Maybe I should put that in capitals. IT GLOWS. Yeah that works. After all other weathering was done (Rust powder on the metals and a home made brownish powder mix on bits of the stone) I used white spirit to let the powders run (including the fluo green powder). As an afterthought I pinwashed a bit of black oil paint in the green censer to get more contrast. After all was dry, I sealed of the model in Matt Coat. As a last step I airbrushed a very thin layer of Livery Green and then a second layer of Vallejo Fluo where the glowing green ball supposedly lights up what's beneath (the back of my painted priest, the floor beneath his feet, etc.) I rather like how it all lights up. I basically can't wait to roll this neon nightmare into my enemy. Now on to a lot of ugly plastic Plague Monks I promised myself I would speed paint (maybe I'll finish them before the big project on the printer is done).
What a pile of junk.. excellent job! The wood looks dry as old bones and the rust is probably keeping it in one piece till it hits a pothole in the road and sets in motion the whole thing falling apart or grinding to a halt till the latest problem is fixed.. that makes me happy inside.
ReplyDeleteGood to know youre toiling away on more reinforcements, as always, I look forward to discovering what the council of thirteen have had you busy doing.
Thanks :) I can only imagine the shrieks of rage (re: underling incompetence) if that things ever gets stuck in a pothole. Its almost worth writing a short story about.
DeleteAs to the Council of Thirteen, they've just informed me that I should deny ever getting direct orders from them...I think I'd do well to heed those orders ;)
Well that is lovely. I certainly remember the rage about the sculpted effects on this when it came out... little did we all know what was to come! Hard to find much of anything that does not have effects sculpted on now, particularly in AOS.
ReplyDeleteLuckily a 3D-printer and (a lot of) resin expand our choices :). I frequently miss the old days of hand sculpted models. Not so much for the smoke effects (don't really mind those most of the time), but because of the infestation of buckles and minor details on models. If you look at how fast you can paint antique Ruglud's to a reasonable standard versus any modern stitch covered Kruleboy it is almost depressing. I'm still hoping GW's designers will at some point take their foor of the accelerator and tone it down a bit (for the rank and file at least). But as I started out saying, there are alternatives these days.
DeleteThat green looks amazing on this model! Fantastic work on all the weathering effects. Love that model.
ReplyDeleteI'm not a big fan of the printed effects, but like you I understand why they are there. I really try to separate "hate" from just not being my jam. Fine if it's there, but I personally don't want the effects.
Cheers! I agree with you. It would be interesting if there was a fumeless censer variant. Perhaps the 3D printer could offer a solution (although I'm not going to rip my model apart to find out ;).
Delete